
Working with Video and Graphics in Adobe Tools: Practical Editing Techniques
Creating clear instructional or eLearning content often means working across more than one Adobe application. Video clips may need resizing to fit a specific layout, while vector graphics often require colour adjustments to match a course design or visual standard. These needs often come up when editors look for how to resize a video in premiere or designers want faster ways to recolour complex illustrations. Adobe Premiere Pro and Adobe Illustrator handle these tasks differently, and understanding a few key tools in each can save time and reduce unnecessary work.
These tasks often come up in real production workflows, including instructional design and internal training projects handled by teams such as Pathways Training & eLearning Inc., where clarity, consistency, and file flexibility matter more than visual effects.
This guide covers two common tasks that appear in real projects: resizing video clips in Premiere and modifying vector graphics using Live Paint in Illustrator.
Resizing Video Clips in Adobe Premiere Pro
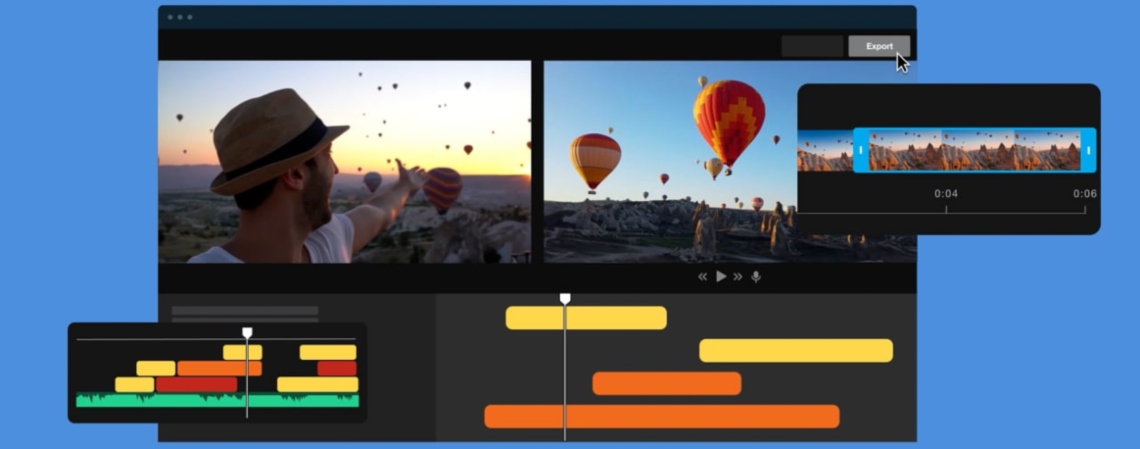
By default, Premiere applies uniform scaling, which locks width and height together. This is fine for standard formats, but less helpful when clips don’t match your sequence. Many users search for how to change video size in premiere or how to change size of video in premiere when working with footage recorded in different aspect ratios.
Understanding Premiere’s scaling behaviour
Premiere does not immediately expose full control over dimensions. If you need adobe premiere pro change video dimensions without cropping or distortion, the settings are available in the Effect Controls panel. This approach answers common questions like change video size adobe premiere, premiere pro video size, and how to change frame size in premiere.
How to resize video clips step by step
- Open Effect Controls (Window → Effect Controls).
- Select the clip in the timeline.
- Under Motion, locate Scale and Scale Width.
- Disable uniform scaling.
- Adjust width and height independently.
This workflow covers premiere pro resizing video, how to resize video in premiere pro, and premiere pro resize video without destructive edits. It is also the most reliable way to how to scale video in premiere pro when working with non-standard footage.
Editors often rely on this method as a practical resize video premiere pro solution rather than using sequence changes, which can affect all clips.
When to use non-uniform scaling
Independent scaling is useful for:
- Screen recordings
- Vertical or social media clips
- Multi-panel layouts
It is not recommended for faces or footage where distortion would be visible. This distinction matters when users try adobe premiere pro resize video or premiere change resolution and expect different results.
If you simply need to adjust scale within a frame, how to resize video in premiere via Effect Controls is usually preferable to altering sequence settings or using an external adobe video resizer.
Modifying Vector Graphics with Live Paint in Adobe Illustrator
Video content is often paired with diagrams or icons. Designers frequently ask how to use live paint in illustrator when downloaded vectors cannot be recoloured easily.
Why some vector areas can’t be filled
In Illustrator, only closed shapes accept colour. Line-based artwork often lacks closed paths, which is why how to use paint bucket in illustrator becomes a common question.
Using Live Paint to recolour illustrations
The live paint feature lets Illustrator treat intersecting lines as fillable regions, even when shapes are not technically closed.
How to activate Live Paint
- Select all parts of the illustration.
- Choose Object → Live Paint → Make.
- Switch to the Live Paint Bucket tool.
This answers how to use live paint bucket in illustrator and introduces the illustrator paint bucket workflow used in instructional graphics. Once enabled, the paint bucket tool illustrator allows you to click directly into regions to apply colour.
Handling gaps and line breaks
Live Paint supports tolerance for open paths. Through Gap Options, you can define how far colour should flow, which is why live paint illustrator works well even with sketch-style drawings. This behaviour differs from illustrator live trace, which converts raster images and is not required for Live Paint workflows. Tools like live paint bucket tool illustrator, live paint bucket illustrator, and the illustrator live paint bucket are especially useful for diagrams that need fast colour changes without rebuilding shapes.
Bringing video and graphics together
In real projects, teams often combine these techniques:
- Adjusting footage using how to resize video premiere pro
- Refining layouts through resize video in premiere pro
- Recolouring vector graphics using Live Paint
Understanding both sides of the workflow avoids unnecessary exports and manual fixes.
Common mistakes to avoid
- Over-scaling video instead of reframing
- Forgetting to expand Live Paint artwork before export
- Mixing inconsistent arrow, icon, or colour styles
Adobe Premiere Pro and Adobe Illustrator are designed for different tasks, but they frequently intersect in practical production workflows. Knowing how to resize a video in premiere and how to apply Live Paint correctly helps keep visuals flexible, consistent, and ready for reuse across platforms. These tools are built into Adobe software, but they are often underused simply because they are not obvious. Once learned, they become reliable techniques for everyday editing and design work.